

MY PASSION—HELPING HORSES WORLDWIDE
Three-day eventing has often been called “The Pinnacle of English Equestrian Sports,” mainly because it encompasses several disciplines—all of which the successful event rider must master. It is an “equine triathlon.” The Three Stages of Competition were designed to test training, endurance, and versatility. In early days, only commissioned military officers could take part when the sport first appeared in the 1912 Olympics.

Speaking from the point of view of a saddle manufacturer, ideally you would have AT LEAST TWO and PREFERABLY THREE DIFFERENT SADDLES to complete the competition because of the different requirements of each day.
DAY ONE: of the competition is Dressage Phase, which requires a well-fitted and comfortable dressage saddle to fulfill the requirements of a dressage test. This phase test obedience, flexibility, and harmony between horse and rider. We discussed the requirements of fitting a dressage saddle in quite a bit of detail in an earlier article, which can be seen here: . (https://dressursport.com/fitting-the-dressage-saddle-debunking-the-8-common-myths-of-saddle-fitting-methods%f0%9f%87%a8%f0%9f%87%a6/
DAY TWO: is something that I always found the most fun but also the most challenging for both horse and rider. Early competitions had FIVE PHASES on this day to test both speed and endurance, including:
–Roads and Tracks
– Steeplechase
–another Roads and Tracks before the actual
–Cross-country phase.
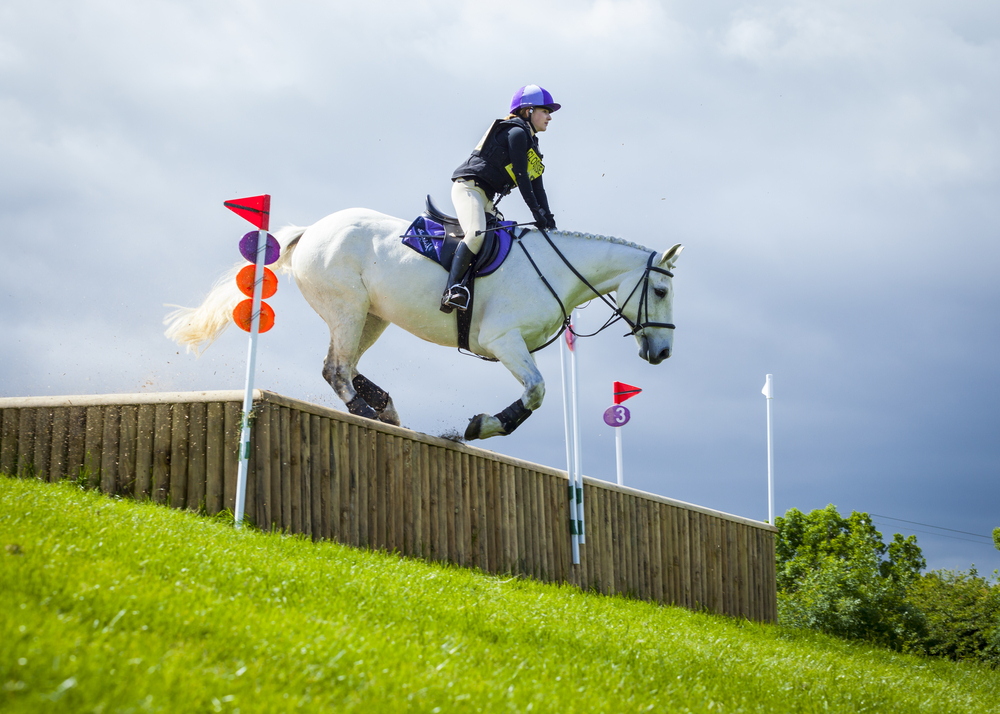
The horse had to be able to distinguish going through the jumps (ie: bushes on the racecourse in steeplechase), and over the jumps in the actual cross-country phase. They also had to be comfortable with occasionally getting very wet in the water jumps! This phase essentially tests horse and rider of speed, stamina (endurance), and jumping ability. This was known as “The Long Format,” and totalled around 20 miles in all. This is what I experienced when I was still competing. You can use a cross-country saddle for this phase or make do with a good jumping saddle which will serve you as well in the next phase. We will discuss what the necessary design features are of both types of saddles used in phases two and three.

DAY THREE: concludes with the Show Jumping Phase. This phase tests the horse’s soundness and athleticism after two gruelling days of competition. The horse must recognize that these jumps need to be navigated by jumping over them, but that they are more forgiving to mistakes than the solid cross-country jumps.
Unless competing at the highest levels, most modern-day horse trials are one-day or two-day events encompassing all three disciplines into one or two days.

PERSONAL JOURNEY
I was a member of the German Young Rider National Team in the early 1980s. The above photo is of myself with my beautiful Hanoverian gelding, Pirat, during the cross-country phase at the 1982 German National Championships in Achselschwang, Bavaria, Germany. In 1984 after qualifying for the European Championships, I had to retire my beloved friend, Pirat, due to lameness, and my riding career came abruptly to an end. I wish I knew then what I have learned in the past 45+ years as a German Certified Master Saddler after consulting with equine professionals around the world. At very least I know my partner would have been sound a lot longer; at best my riding career would have gone much farther.
After placing in The German Nationals in 1982 Pirat began showing signs of lameness—which at the time I did not attribute to the saddle, since I was surrounded by experts—vets, trainers, farriers who all had a job of keeping us fit for the team. When I think of the remedial applications we used in an attempt to ward off the lameness with, including blocking, blistering, re-shoeing and all sorts of pharmaceuticals, I get incredibly sad. I know now it was simply the fact that the construction of my saddle was not in keeping with the requirements of the horse—with every step his shoulders were hit by forward facing tree points, the too narrow gullet impacted his spinal processes, ligaments, and nerves along his back, and the gullet plate likely pinched him and impeded his wither muscle as he tried to jump and move. I had followed the advice of the experts, but the result was a ‘textbook case’ of torture for my poor horse.
Since I know now my horse suffered from an ill-fitting saddle, I became determined to alleviate this consequence for other horses. It has been my life goal and my passion to make a difference by educating riders to help them find optimal saddle solutions for comfort, performance, and equine development. Many saddle fitters can fit to a horse standing still in the crossties (“static fit”), but the saddle must work with the biomechanics of the horse in motion for complete back freedom (“dynamic fit”). Sometimes this means an interim asymmetrical or orthopedic adjustment to accommodate a larger shoulder on the horse to prevent the saddle from being pushed to one side during movement.
Especially in three-day eventing, which is truly a partnership between horse and rider, saddle fit for each of the three phases becomes critical and mandatory. Although both cross-country and jumping saddles are remarkably similar, there are a couple of small design differences. Let us look first at the critical features to allow optimum jumping performance.
These are the criteria that are essential to allow your horse to jump clean, both in cross-country and stadium phases:

>>EXTREME SHOULDER RELIEF PANELS<<
to complement rear-facing tree points. As the shoulder will move between 4-8” upwards and backwards during motion (both at the same time during a jump) you do not want anything interfering with the ability to lift the forelegs!

>>WIDE GULLET CHANNEL<<
To ensure freedom on the spinal processes and put the panel pressure and the rider weight on the longissimus dorsi muscle on the horse’s saddle support area (between the base of the withers and the 18th thoracic vertebra)

>>EXTRA FORWARD FLAP<<
To allow the rider the necessary shortened stirrups to help the rider maintain their two-point position. Both flap angle and flap length need to accommodate the needs of the rider.
>>LONG BILLETS<<
Although this may be a personal preference, it is suggested that in order to have a short, both-sides-elastic girth that will not impede either the rider with buckles under the flap nor the horse.

>>(EXTERNAL) THIGH & CALF BLOCKS<<
to aid the rider in supporting a secure leg position, especially over jumps. These are again a personal preference and could optimally be removable using Velcro options as desired for the stadium phase.
>>QUARTER CUT-BACK POMMEL<<
To again allow freedom at the withers.

Now let us briefly discuss some of the accompanying tack pieces that many riders use. A BREASTPLATE (or breastcollar/breastgirth) is a piece of equestrian tack that connects the saddle to the horse’s chest to prevent it from sliding backward, particularly during jumping, galloping, or riding on steep, uneven terrain. It stabilizes the saddle, ensuring comfort, and acts as a safety feature that keeps equipment in place. Although I admit that I did use a martingale at times, my point of view now is simply that a well-fitted saddle does not need any further assistance to stay in place beyond the right girth—given the fact that it will have been fitted to accommodate the shoulder movement during jumping without the danger of sliding, slipping, or being pushed back.

One of the accessories which tends to get the least amount of attention is to is the girth. There are various sizes, shapes, and designs of girths but few of them make very much sense when we look at the way they fit the horse. When you girth up on your horse with long billets the girth, when tightened, should be within the last two to three holes of the billets. When we carried out thermography testing out on saddle, one of the highest points of heat and friction we found to be where the billets lie against the edge of the horse. The less distance between the bottom of the flap and the top of the girth, the less irritation that results. Every saddle has a different flap and billet length depending on the manufacturer and therefore it is necessary to try the different lengths out to see what fits your horse.
The girth will always slide into the area of least resistance, which is the narrow area right behind the elbow. Another common mistake is the shape of the girth. A horse has a curved shape with relief needed in the elbow area, an area easily chafed by the girth. It is necessary to have a girth that has an area cut out behind the elbow. (ie: Girth B is preferable to Girth A, for reasons outlined below)

This gives the horse the ability to move the front leg without inhabitation by the girth itself. The type of girth seen in diagram A is very straight with only one strip of hard leather through the center. This type of girth puts all of the pressure onto that thin leather strap and therefore almost acts as a ‘knife’ across a horse’s sternum and pectorals.

The girth seen in diagram B has the cutouts for the elbow—the hard leather goes all the way out to the edges with a soft leather backing which disperses the pressure over a much larger surface area and therefore makes the horse more comfortable. A girth with a wider center also helps to stabilize a saddle from slipping side to side or going forward. This shape, or a simple string girth, are usually preferable.

i

One of the major controversies where girths are concerned is elastic versus no elastic girths on the ends. If a girth has no elastic than there is no give at all once a saddle is girthed up. This means that we have a solid leather band around the horse’s ribcage and therefore around the horse’s lung area. Often a horse will be short of breath or shows irritability after a ride in this type of girth because they have not been able to breathe properly. A girth with only one side of elastic is both better and worse. The advantage is that now the ribcage has room to expand; the downside is that the give is only on one side and therefore can pull the saddle off to that side and cause unevenness in the horse’s movement and muscular development. The best situation is a girth with both sides of elastic—however, the elastic must be strong and short. If the elastic is too long or too weak, the girth loses its stability and will stretch—allowing the saddle to move around on the horses back.
On a short girth the elastic should be no more than an inch long and on a long girth the elastic should be no more than 2 ½ inches in length. This will give the ribcage the room it needs while keeping the saddle stable on the horse’s back. Of all the accessories the girth is the most important as it directly affects the way that your saddle is fitting, positioned, and how it feels to your horse.

STRING (or) Cord Girths
In conclusion, it becomes pretty obvious that once again proper saddle fit is the basis for performance – in any discipline, but especially in three-day eventing, where the partnership between horse and rider is unequivocal!
About Jochen Schleese and Schleese Saddlery Service Ltd.

©2026 Saddlefit 4 Life™ All Rights Reserved
For more information about Jochen Schleese and Schleese Saddlery Ltd. please go to:
🌐 https://saddlefit4lifeacademy.com/
TO ASK QUESTIONS OR COMMENT, USE THE FORUM DIRECTLY BELOW


