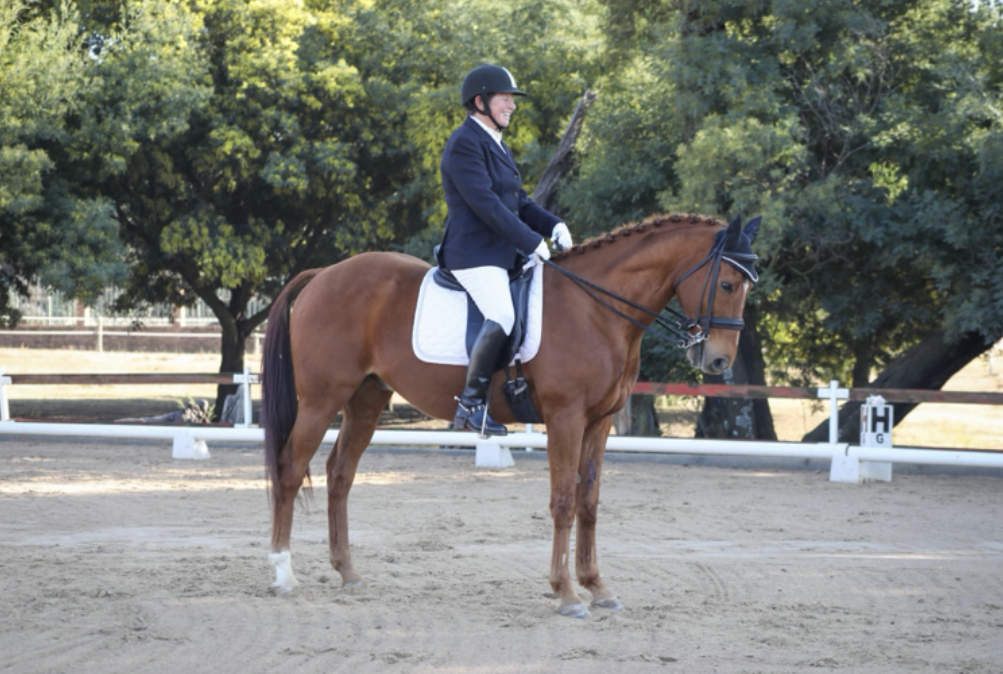
Often, riders new to the sport do not understand what is being asked when they ride a dressage test because they do not understand what is being judged. The first thing someone sees at a dressage show is that most of the horses are flexed at the poll. It makes the horses look regal with their plaited manes and brushed out tails. The riders are dressed in formal hunting attire with subdued and conservative colors.
It is all so elegant, but the real purpose for dressage shows is to test the horse’s level of training and its understanding of the rider’s aids.
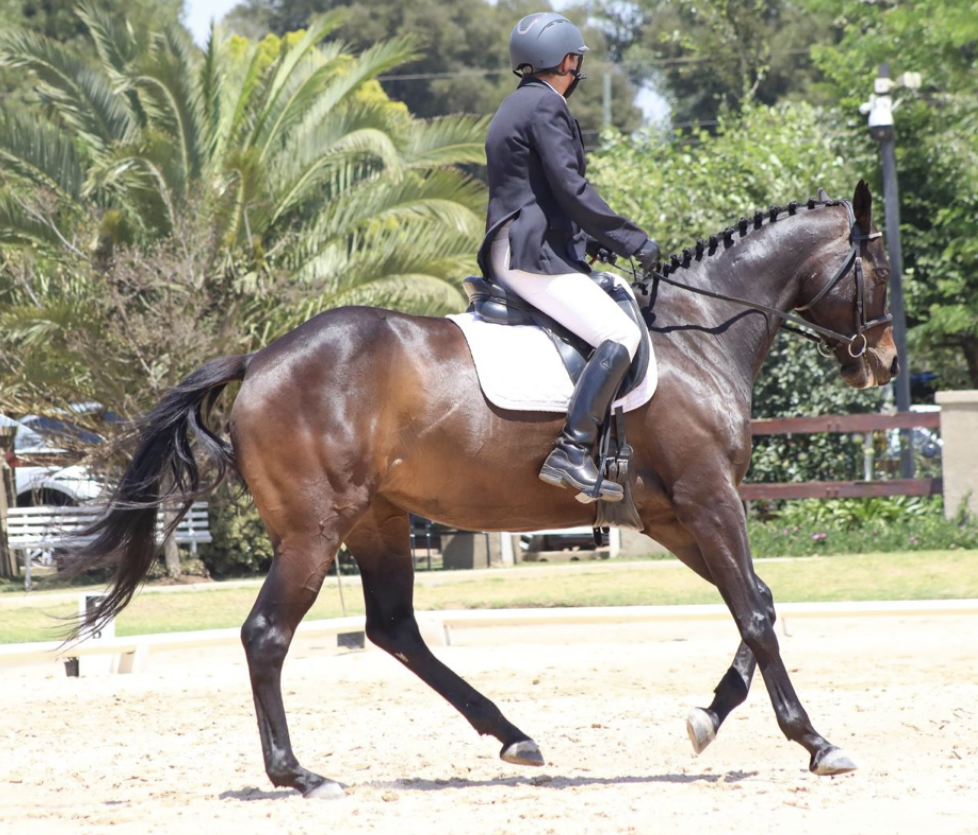
Because it is an exam of the horse’s ability, the classes are in the form of a test. A test is a list of instructions directing the judge to confirm that the horse and rider pair have achieved the requirements for that test and that level. Each level has its own set of tests, and as the levels go up, the requirements for the horse and rider to perform get harder, thus requiring more training.
The writers of tests truly want everyone to succeed, so they leave “clues” on the test itself. The first clue, labeled “Purpose” appears at the lefthand top of the test. It gives a general idea of what the judge will be looking for that differs from the previous level of tests.
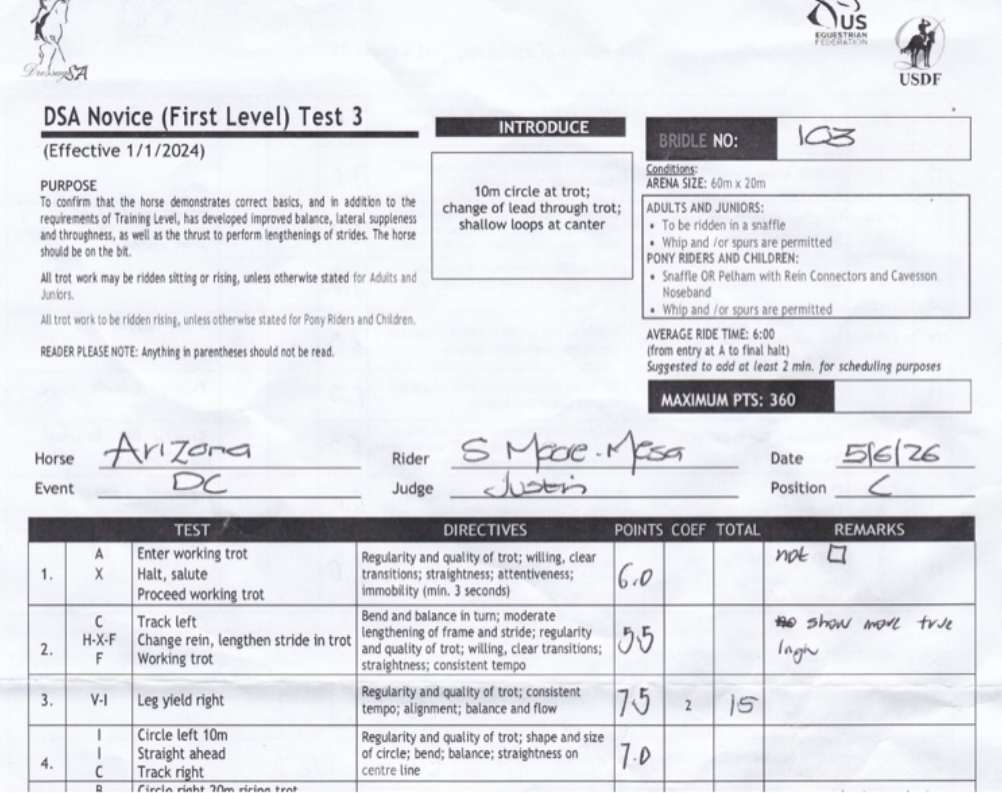
The second kind of clue appears in the middle of the test paper, labeled “Introduce.” It lists all the new movements required for the first time in this test. This lets the rider know what they can expect and what they must train for.
For each movement, the test will provide directives specifying what the judge will be looking for in that movement. Accuracy is important. Each movement is designed to test the horse’s level of training, balance and obedience.
The test movements identify where the movement should start, where it should end and the size of the school figure that is to be performed. To get the best score, the rider must strive to perform each movement to the best of his/her ability. Without accuracy, the correct and precise execution of the specified movement, the judge cannot see if the rider and horse have fulfilled the requirements of the level.
Riders should familiarize themselves with the geometry of the dressage arena. The letter “A” is located in the middle of one of the short ends of the arena. It is the location at which riders enter and exit the arena. The letter “C” is located in the middle of the opposite end of the arena and is where the judge would be located. Both letters “A” and “C” are located 10 meters from the two long sides. The letters F, K, H and M are located along the long sides of the arena and are the letters closest to the corners. Each of these letters is placed 6 meters from one of the four corners. The letters P, V, E, B, R and S are also located along the long sides of the arena and are each separated by 12 meters from the other letters on that long side.
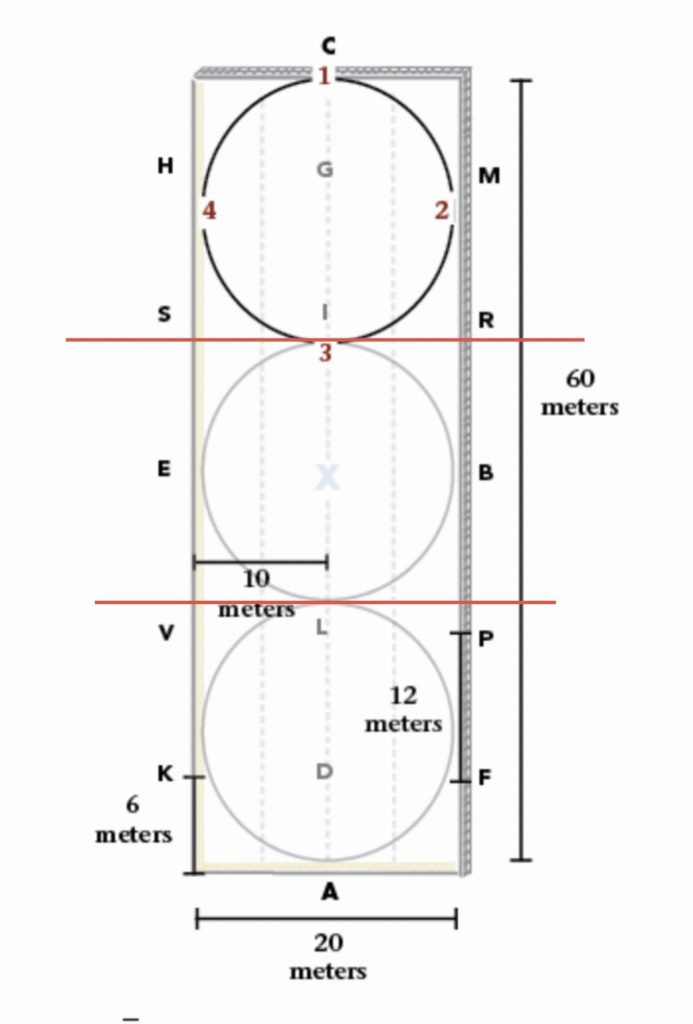
There are five imaginary letters within the riding area of the arena. They are located along the centerline. These imaginary letters are located midway between and 10 meters from the letters along each of the two long sides of the arena. More specifically, D is between F and K; L is between V and P, X is between E and B, I is between S and R, and G is between H and M.
Another resource a rider has is the current rule book of the Dressage Federation they are riding under. There is a description of the movements and the terms used; such as “track” (the line ridden when next to the arena surround, and corner-turning from one side of the arena to the other), and “movement” (the exercise description of what is being judged).
A dressage test is broken up into a series of movements. A movement starts when the rider’s leg has arrived at a point that is next to a letter specified in the test.
For example: when Riding a Diagonal, the rider should only leave the track as their leg is passing the letter. The rider should aim to arrive at the track on the opposite side of the arena at a point that is one meter before the letter so that the horse is straight on the track as the rider’s leg passes the letter.
There are 2 times the rider does not wait to pass the letter to start a movement: turning down the centerline, and when the rider turns at a letter.
For example: B turn left, E turn right. The rider is meant to start the turn before the letter to ride straight towards the next letter. The same applies to: A turn down centerline. If the rider waits for the letter A to start turning they will miss the centerline completely.
When traveling along the track, the horse and rider need to be straight, not drifting off the track or with the horse’s hind quarters inside of the track.
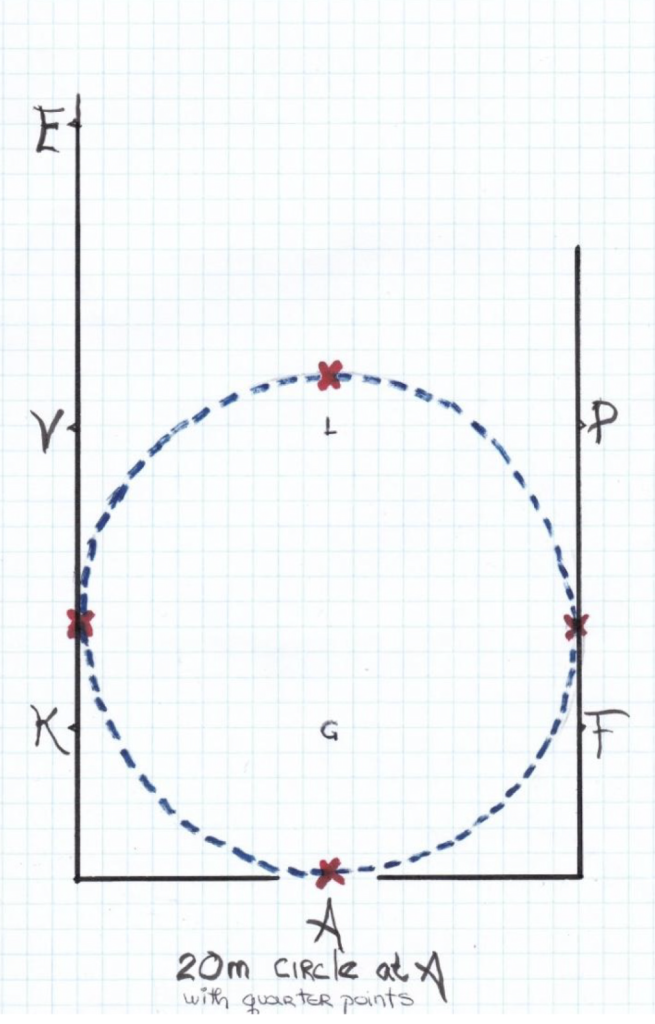
The rider will also need to learn to ride a circle, not an egg, or a square with rounded corners, or a flat tire but a proper circle, with equal distance from its center all the way around. Training Level will have circles that are 20 meters in diameter and 10 meter half circles to proceed down centerline. The circles get smaller as the levels go up, as smaller circle require more engagement of the hind leg of the horse.
The easiest way to correctly ride a 20 meter circle is to divide the circle up into 4 parts. If the circle starts at A then the next part will start 4 meters past the corner letter. The halfway mark will be on the centerline 2 meters above the letter L and the last part will start 4 meters before the corner letter. The circle will end back at A. If the horse is bending correctly the line ridden between each point will be curved creating a circle. The rider should aim to only stay on the track or a quarter point for a short distance. A 20 meter circle will use 3 walk steps at each quarter point before going to the next quarter mark of the circle, 2 trot steps or 1 canter stride. The smaller the circle the less steps at each quarter mark.
A good exercise is to count the horse’s steps between each of the 4 points. They should all be the same or close to it. For example: 12 steps from A to the side of the arena, 13 steps to the centerline, 12 steps to far side of the arena and 11 steps back to A. Each horse’s stride will be different so the number of steps will depend on the horse and gait they are in.
10 meter circles require more from the horse and rider; more balance, more bend and more engagement of the inside hind leg. A 10 meter circle is used at even the lowest level: the final turn down centerline.
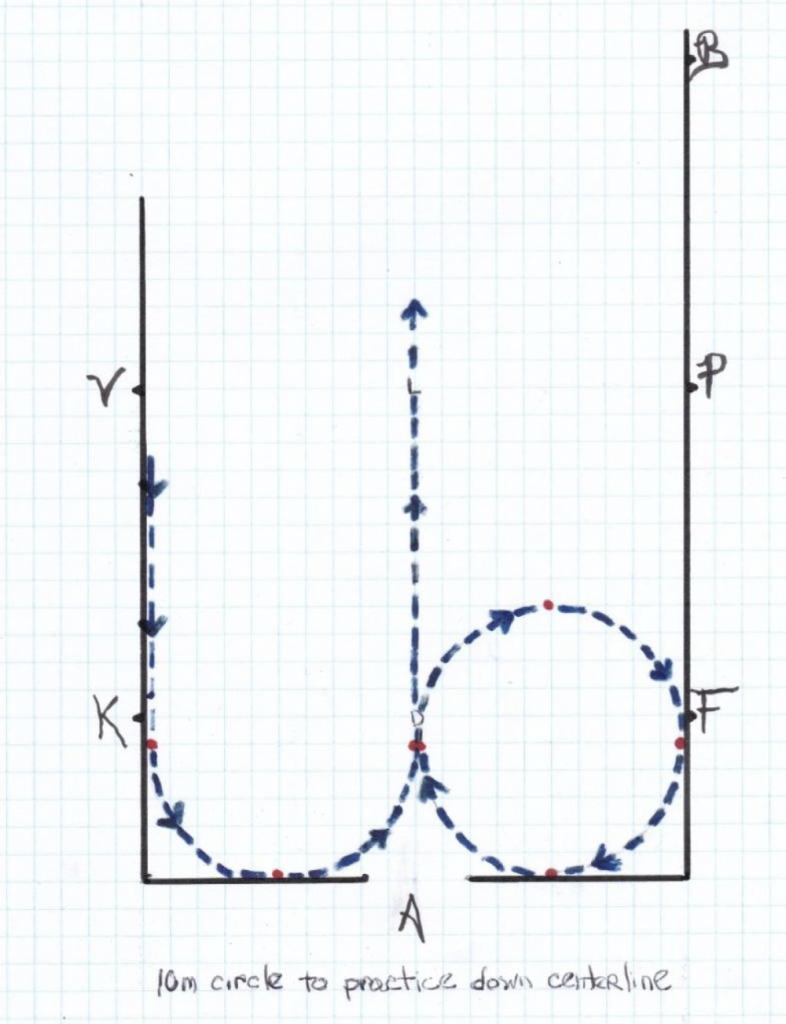
10 meter circles ridden in the corners are a good way to set up for that final turn down centerline. By practicing a whole circle not just the half circle needed, the rider is helping the horse not to flatten or fall in on its shoulder as it will eventually proceed down center line.
The rider should remember that the letters K and F are 6 meters from the corners so they should only start their circles 1 meter past those letters in the direction of the corner. The rider should aim for 1 stride to be halfway between the corner and either A or C, then aim for the centerline-1 stride on the centerline 5 meters from the end of the arena and then 1 stride 4 meters above the letter on the long side.
Riding a 10 meter circle from the centerline to the corner will give the rider 2 sides of the arena to work with, helping the rider understand and develop a feel for an accurately ridden 10 meter circle. At the same time it gives the horse boundaries and helps it to balance on the smaller circle.
In the beginning, the horse may try to flatten the circle, lose the proper bend, and even slow down its rhythm in the attempt to execute the 10 meter circle. These are natural reactions on the horse’s part and that is why it is so important to practice these school figures before riding a test at a show.
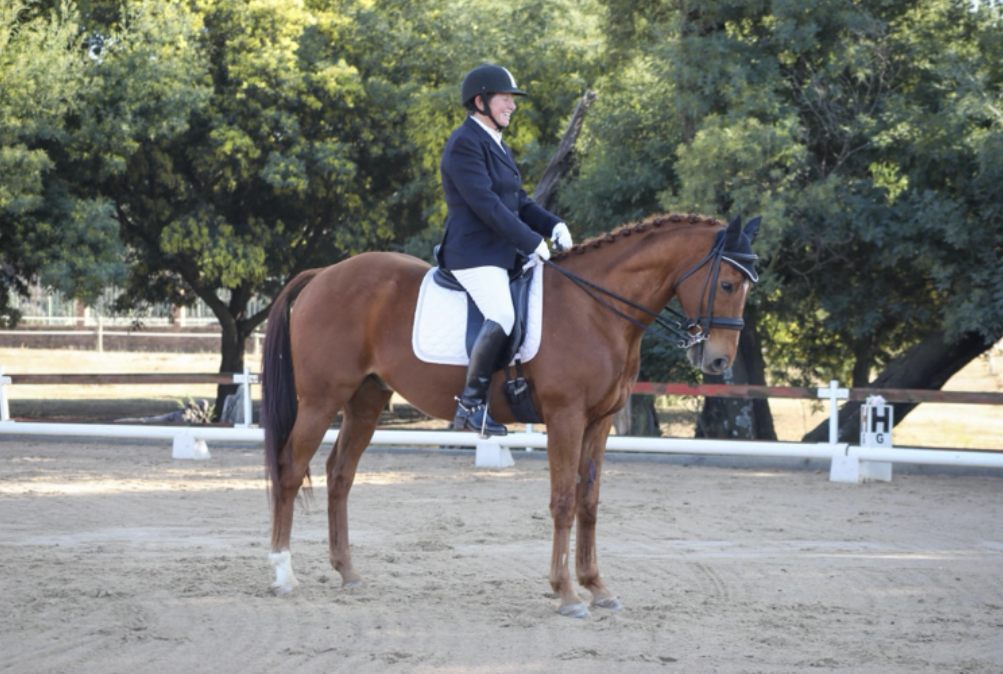
The centerline is the first and last thing that is judged. A balanced, straight centerline with a balanced transition into a straight halt will leave the judge with a good impression of the rider and horse.
The next thing the rider and horse should be able to do is ride a straight line. If the horse is on the track next to the arena wall, the horse should be tracking his hind foot directly in line with the front foot on that side. Horses will often throw their hindquarters to the inside or out, and they may also drift off the track. Both are faults in a dressage test and should be corrected.
These are balance issues for the horse. The word balance is seen multiple times in the directives of the test. The horse’s balance is very important. Without balance, the horse is tense and fears falling. They will be quick or slow or trying to compensate for their balance by falling in or out in a movement. It is the rider’s job to ensure that their horse is ready for the level of balance required for each level.
TRANSITIONS ARE IMPORTANT & ESSENTIAL TO RIDING
Transitions increase the horse’s balance by creating more engagement.
In order for the rider to be accurate, the rider must be aware of where a transition should happen and how long it will take their horse to respond to the aids in completing the transition. This will change over time with training and preparation. If the movement calls for a trot at M, the rider should not get to M and ask the horse to trot. The transition will be considered late. The rider should cue the horse with enough time and preparation for the horse to respond correctly and fluidly, creating the impression of harmony between horse and rider.
A common mistake is to anticipate a transition and start it before the requirement. For example, if the rider is to canter between A and F and they start the canter before A. Another example would be when a lengthening of the trot is to be performed HXF, but the rider starts sending the horse forward just after C. The judge is expecting the rider to prepare beforehand, slowing or half halting the horse the last few strides before a transition between paces. In a transition within a pace, the judge usually gives the rider and horse 2 to 3 strides to develop the exercise being asked for. The higher the level being ridden the quicker the reaction time required.
The judge will be looking for a rider and horse that move through the test accurately and fluidly—reflecting harmony between the rider and horse. To prepare, the rider should ride through a new test a few times to find the areas that cause the horse problems. They should work on those areas until they are performed seamlessly. Only then should they try the full test again to ascertain that the movement is smooth and accurate.
The rider should not “drill” the horse on the test they are going to ride. The horse will sour of the repetitive work. It will start to evade the harder parts or anticipate them. The rider should practice the individual movements but not in the order of the test.
If the horse is prepared properly, riding the test at home should come easy before entering a show. The rider will have enough to worry about the day of the show. The horse will also be tense: new place, new noises, horses that it doesn’t know. Being prepared is the best way to help lessen the stress on the day.

Written by Susan Moore Mesa August 2026
PLEASE FEEL FREE TO ASK QUESTIONS OR LEAVE COMMENTS IN THE FORUM BELOW
SOCIAL MEDIA: